Every component in a home follows a predictable arc. Materials leave the factory at peak performance, hold steady for years, and then begin a gradual decline that accelerates as protective layers wear away. The difference between a property that ages well and one that ages poorly is rarely the quality of its original construction alone. It is how consistently owners intervene during that long middle stretch, when modest care can flatten the curve and push major expenses years down the road.
Aging gracefully means planning ahead instead of reacting. Living landscapes need periodic evaluation before storms test them, moving assemblies need adjustment before they fail, and surfaces underfoot need the right preparation and materials to stand up to daily traffic. Overhead, below grade, and inside the walls, each system has its own service life and warning signs. Owners who understand those timelines can budget for upgrades, choose durable materials, and time improvements so one project supports the next. The result is a property that stays comfortable, safe, and valuable well beyond the point where neglected homes start to show their years.
Assessing Root Plate Stability and Cabling Weak Limb Unions

A large canopy can look healthy while its foundation quietly weakens. Trenching for utilities, driveway expansions, and heavy equipment traffic can sever roots and compact the soil around them, leaving less anchorage to resist wind. Codominant stems joined by included bark form a weak connection that may split under snow, ice, or summer storms. Signs such as cracks at the union, mushrooms near the base, or soil heaving on one side often point to structural problems long before a failure occurs.
Experienced local tree services use ISA risk assessment methods to evaluate both the canopy and the root zone. Arborists may excavate the root collar with an air spade to inspect for girdling roots and decay without damaging the remaining system, and they can use sonic tomography or resistance drilling to measure internal soundness. Weak unions are supported with static or dynamic cabling installed to ANSI A300 standards, usually about two-thirds of the distance from the union to the top of the crown. Annual follow-up inspections confirm the hardware and limbs remain stable.
Replacing Frayed Lift Cables and Tuning Opener Force Settings
Lift cables carry the full weight of an overhead sectional assembly, and they wear where they are least visible. Moisture and road salt corrode the cable ends at the bottom brackets, strands fray as they wrap and unwrap around the drums, and an uneven wind can cause one side to lift before the other. Opener settings drift over time as well, and force levels set too high can allow the unit to keep closing against an obstruction instead of reversing, which creates a serious safety risk for children, pets, and vehicles.
Routine garage door repairs keep those parts working safely and smoothly. Technicians release spring tension before replacing worn cables in matched pairs, then rewind each drum evenly so the sections travel level. Corroded bottom brackets are replaced, and opener travel limits and force settings are recalibrated to the manufacturer’s specifications. Photo-eye sensors are aligned about six inches above the floor, and the auto-reverse feature is tested by closing the unit onto a flat 2×4 board. Proper adjustment protects both the household and the opener motor.
Testing Slab Moisture Vapor and Bonding Polyaspartic Topcoats
Concrete slabs constantly release moisture vapor from the ground below, especially when they were poured without a vapor barrier. When a resin system is applied over a slab with high moisture emissions, vapor pressure builds beneath it and pushes the finish upward in blisters and bubbles. Alkalinity from the concrete can also break down adhesion, and old sealers, oil stains, or curing compounds prevent a strong mechanical bond. These problems often appear months after the work is complete, long after the surface looked perfect on day one.
A dependable epoxy floor coating service confirms that the slab is ready before mixing any material. Technicians test moisture levels using calcium chloride kits or in-situ relative humidity probes, then apply a moisture-mitigating primer when readings exceed the manufacturer’s limits. The surface is diamond-ground to remove contaminants and open the pores, and cracks are repaired so they do not telegraph through the finished system. A UV-stable polyaspartic wear layer goes on last, resisting yellowing, hot tire pickup, chemical spills, and abrasion for years of hard use.
Power-Stretching Broadloom Textiles and Seaming Hidden Joints

Wall-to-wall textiles that are not stretched tight enough will loosen with foot traffic, furniture movement, and humidity changes. Ripples and wrinkles soon appear across the room, and the backing begins to wear unevenly along each fold. Poorly placed seams create visible lines in high-traffic paths, while edges cut without proper sealing can fray and unravel. Pairing the wrong cushion with the product can also shorten its life and void the manufacturer’s warranty before the material has a chance to show its value.
Professional carpet installation follows the Carpet and Rug Institute’s CRI 105 standard to deliver a tight, long-lasting result. Crews fasten tackless strips around the perimeter, roll out a cushion that meets the manufacturer’s density and thickness requirements, and use a power stretcher rather than a knee kicker alone to pull the material taut across the full span. Seams are positioned away from main walkways and light sources, bonded with hot-melt seaming tape, and finished with a seam sealer on every cut edge. The result lies flat and wears evenly for years.
Nailing High-Wind Shingle Courses and Flashing Valley Transitions
Most shingle blow-offs trace back to how each course was fastened. Nails placed above the manufacturer’s nailing strip miss the overlapping shingle below, while overdriven nails cut through the mat and leave little holding power. Valleys present another weak point, since they collect water from two slopes at once. When valleys lack proper underlayment or are cut carelessly, water can run under the shingles and saturate the deck, often causing hidden rot long before stains show up indoors.
Experienced residential roofers pay close attention to both fastening and valley detailing during every project. In high-wind areas, crews drive six corrosion-resistant nails per shingle within the designated nailing zone, setting each fastener flush without breaking the surface. Valleys receive a full-width ice-and-water membrane before shingles are applied, and crews choose a closed-cut, woven, or open metal valley based on the shingle type and slope. Clean, consistent cuts keep water moving down the channel rather than under the shingles, protecting the deck below.
Percolation-Testing Native Soils and Bedding Leach Field Trenches
An underground wastewater system succeeds or fails based on the soil beneath it. Dense clay drains slowly, sandy soil can pass effluent through too quickly for proper treatment, and a high seasonal water table can saturate the treatment zone. When a drain field is undersized or built in unsuitable soil, effluent backs up into the home or surfaces in the yard, creating odors, health hazards, and an expensive rebuild that often requires a new location on the property.
A licensed septic installer starts with percolation testing and a soil evaluation to measure how quickly the ground absorbs water and how close the seasonal high water table sits to the surface. Using those results, along with the number of bedrooms and local health codes, the system is sized and permitted before excavation begins. Trenches are cut to the specified depth, bedded with clean aggregate or fitted with chamber units, and the distribution box and laterals are laser-leveled so effluent spreads evenly. Inspection ports simplify future monitoring and maintenance.
Grounding Service Entrances and Bonding Metal Gas Piping

Grounding and bonding give stray current and lightning surges a safe path away from people and equipment. Many older homes relied on metal water lines as the primary ground, but plumbing renovations that add plastic pipe can interrupt that path without anyone noticing. Corrugated stainless steel tubing used for gas lines can be damaged by nearby lightning strikes when it is not properly bonded, and ungrounded two-prong outlets leave appliances and electronics more vulnerable to shock and surge damage.
A qualified electrician verifies that the grounding electrode system meets current code requirements and repairs any gaps. That work often includes driving two 8-foot ground rods at least six feet apart, connecting them with a properly sized copper conductor, and installing an intersystem bonding termination for cable and telecommunications services. Gas piping, including corrugated stainless steel tubing, is bonded according to the manufacturer’s instructions. Where rewiring is not practical, GFCI protection can add shock protection to older ungrounded circuits, giving the home a safer foundation.
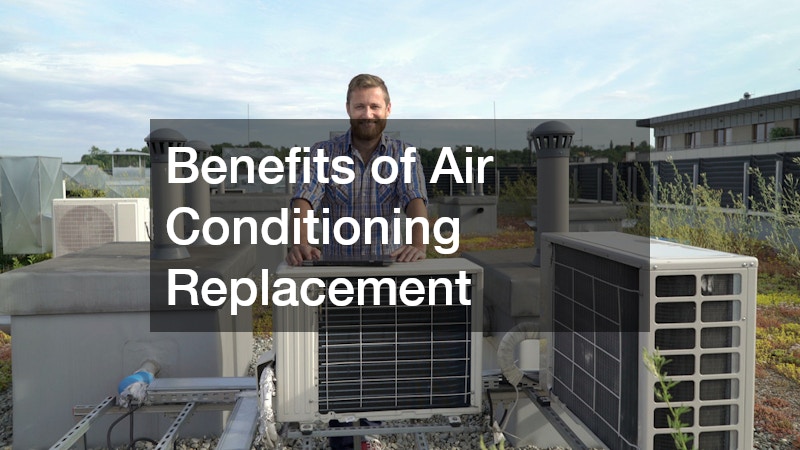
Running Manual J Load Calculations and Brazing Copper Line Sets
Cooling equipment is often sized using rough rules of thumb based only on square footage. An oversized system cools the space quickly but shuts off before removing enough humidity, leaving rooms cold and clammy while short cycling wears down the compressor. Line sets brazed without a nitrogen purge form copper oxide scale inside the tubing, and that debris can travel through the system to clog metering devices and damage the compressor over time. Leaky or undersized ductwork reduces comfort and efficiency even further.
Qualified ac installers size equipment with an ACCA Manual J load calculation that considers insulation, window area, orientation, and air leakage. They use Manual S to select equipment that matches the load and Manual D to confirm the ductwork can deliver the required airflow. Copper line sets are brazed while dry nitrogen flows through the tubing, pressure tested for leaks, and evacuated to 500 microns with a decay test. Final charge is confirmed by subcooling or superheat, and static pressure is measured to verify the entire system performs as designed.
Scrubbing Glazed Flue Deposits and Fitting Stainless Steel Caps
Third-degree creosote forms a hard, shiny glaze inside the flue that standard brushing cannot remove. This glaze is highly flammable and can ignite into a fire hot enough to crack clay tile liners and damage nearby framing. Open flue tops also invite rain, leaves, birds, and raccoons, and water entering from above accelerates the deterioration of mortar joints and liners. Nesting debris can also block exhaust and push dangerous combustion gases back into the living space.
Certified chimney cleaners treat glazed deposits with chemical modifiers that convert the hard buildup into a brittle material that can be removed more easily. Rotary sweeping systems with poly or carbide heads then clear the flue walls without damaging the liner, and a camera inspection documents the condition of every section. A stainless steel cap with spark-arresting mesh is fitted to keep out rain, animals, and debris. When the inspection reveals cracked tiles, a stainless steel liner can restore a safe, properly sized flue.
Designing Vanishing-Edge Basins and Specifying Automated Equipment Pads

A vanishing-edge design creates a dramatic visual effect, but it requires precise engineering behind the scenes. If the weir is not perfectly level, water spills unevenly and leaves dry patches along the edge. An undersized catch basin can overflow during use or run dry when the system shuts down, exposing the pump to damage. Equipment pads placed without planning often end up noisy, hard to service, poorly drained, and too close to bedrooms or outdoor living areas.
A thoughtfully designed custom pool integrates structural engineering, hydraulics, and equipment planning from the start. Designers size the catch basin to hold the water that drains from the main basin when pumps stop, plus additional volume for swimmers. Weir walls are built and leveled to tight tolerances, and a dedicated variable-speed pump controls the flow over the edge. Equipment sits on a reinforced concrete pad with drainage, service clearance, and noise considerations, while an automation system manages pumps, heaters, lighting, and sanitation from one interface.
Homes that age gracefully are not simply lucky. Their owners understand that every material and system has a service life, and they make decisions that extend it. Healthy canopies are evaluated before storms, moving assemblies are adjusted before they fail, surfaces are prepared correctly before finishes are applied, and mechanical and underground systems are designed for the conditions they will face. Each of those choices reduces stress on the rest of the property.
The most effective approach is to treat maintenance and upgrades as a long-term plan instead of a series of emergencies. Track the age of major components, schedule inspections before peak seasons, and coordinate projects so that work in one area supports another. When it is time to invest, prioritize proper engineering, quality materials, and documented installation practices rather than the lowest upfront price. Keeping records of inspections, warranties, and completed work also helps you plan future budgets and demonstrate the home’s care when it is time to sell.
With steady attention and smart investments, a home can remain comfortable, efficient, and secure for decades. The goal is not to stop aging altogether, but to make sure the property grows older on your terms.